Sunday, October 30, 2011

Cranberry Apple Chutney

One of the first recipes I remember clipping and saving was for Cranberry Apple Chutney. I don't know much about its origins, other than it likely ran in the early 1980s in the food section of The Indianapolis Star, where I was hired as a reporter after college. It has been my must-have Thanksgiving side ever since -- except for the bleak years when the recipe went missing.

Those were dark, pre-internet days. I begged for copies from friends with whom I enthusiastically shared the recipe and tried several variations -- one boasting the endorsement of the White House kitchen. Nothing was quite right. Even my mother-in-law, who politely ate an annual dab even though it's not her thing, was heartbroken on my behalf.

Last year, however, when my husband declared that it was time to clear the attic of long-ignored boxes and install additional insulation, I experienced one of those moments of cosmic bliss where I was reunited with this now yellowed bit of newsprint. I made a batch right away, and several since. I have even enshrined the recipe in a frame that sits in a place of distinction in my kitchen.

Other that that one spontaneous batch, this remains a creation I needlless indentify expressly with Thanksgiving. Its tangy sweetness would be just as delicious slathered on a turkey or grilled cheese sandwich today, or in the middle of summer. And, preserved in small jars, it could be the enjoyed and emptied instead of spoiling amid the forgotten excess of post-holiday leftovers.

I made a triple batch (two full bags of fresh cranberries) for canning purposes, making just a few amendments to the original: I skipped the cloves, because I despise them, and while I've always used Granny Smith apples in the past I used honeycrisps because they are awesome. To extend safe shelf life, I also added a half-cup of cider vinegar and 2 cups of white sugar, neither of which resulted in a significant flavor variation.

When done, the cranberries should be mostly popped, or easily crush with light pressure from a spoon. The texture will be similar to jam or conserve. The mix will appear a bit wet when hot but, trust me, will set up nicely when cooled.

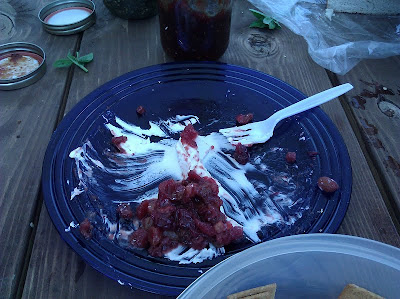
Process in prepared jars for about 10 minutes in a boiling water bath. Remove to heatproof surface and leave undisturbed until fully cooled. Be sure to bring some if you are traveling for Thanksgiving -- you never what sort of suspect cranberry concoction you'll find on even the most elegant table -- but don't wait until then to enjoy. I brought a jar to a canning workshop this weekend and spilled it over a block of cream cheese. Serve with crackers and be sure to grab a bite for yourself before it's gone.
Monday, October 24, 2011

Part II: Pear Sage Jelly

In addition to the bounty from this weekend's excellent pear-pumpkin butter, I had the good fortune to think ahead and save the pear peelings and cores to produce an impressive yield of stock. Its pale color and potent aroma was just the stuff to make jelly.

I wanted to pump it up with something and eventually settled on sage from our garden, which has flavored countless meals all summer. I made a simple infusion with 1 packed cup of fresh-picked leaves and a cup of fruity white wine, which yielded about 2/3 cup of heady sage-pear stock. I then used the Sure-Jell insert's directions for apple jelly, which seemed a reasonable equivalent.

The resulting jelly finished with a fairly soft set that firmed up perfectly in the fridge. The only change I'd make is to add a handful of the smallest sage leaves you can find in the last few minutes of boiling instead of dropping them into the prepared jars just before filling. I had hoped the leaves would scatter and "float" in the clear jelly, but instead they gathered on the surface. Live and learn.

Pear Juice
peel and cores from about 6.5 lbs pears
16 cups water

Bring mix to a boil the reduce to a simmer for about 15 minutes. Remove from heat and cover, allowing to steep for another 30 minutes, or longer if you got busy doing something else -- like make pear-pumpkin butter. Pour into jelly bag over a large pot. Leave it alone for about an hour. Resist the urge to squeeze the bag.

Ditch trimmings and refrigerate stock until ready to use. I used about half of the stock to make the jelly.

Pear-Sage Jelly
1 cup fresh sage leaves, packed
1/4 cup tiniest sage leaves, reserved
1 cup fruity white wine
6 2/3 cups pear stock (more or less*)
9 cups sugar
1/2 tsp. butter
1 pkg. Sure-Jell pectin

Coarsely chopped 1 cup sage leaves and place in small pot with wine. Bring to a boil then simmer 3 minutes. Take off heat and cover, allowing to steep for 30 minutes. Strain and pour stock into measuring cup. You should have about 2/3 cup.

Add enough pear stock* to measure 7 cups. Add package of pectin and butter to juice and bring to a boil. When it hits a full rolling bubble, add sugar all at once and stir until incorporated.

Bring mix to a second boil; just before the lava-like bubbles erupt, add the reserved handful of tiny sage leaves. Stir often until it reaches a boil that cannot be stirred down. Give it 1 full minute then remove from heat. Skim foam well before ladling into prepared jars.

Finish in boiling water bath for 10 minutes. Turn off heat and leave in water for about 5 minutes, then remove to heatproof surface to cool completely. Made about a dozen half-pints.

Sunday, October 23, 2011

Pear-Pumpkin Butter

I've been planning to make pumpkin butter this year but wanted it to be a little different -- a little lighter and fruitier, but with the same undeniable taste of fall. My pear-pumpkin butter turned into a two-day process, but it was time well spent.

I hadn't intended for this to get so involved, but when I asked Tim to bring me two small pumpkins from the farmer's market I expected little orange globes and not the voluptuous baking variety he delivered. The 8-pound orb I used had a dull exterior but bright flesh that filled the kitchen with an intoxicating aroma. I roasted it into tender submission.

Tim helped me peel and core about 6 1/2 pounds of firm pears, a mix of green D'anjou and red Bosc, chosen because they happened to be the varieties on sale. I reserved the trimmings to make pear stock for jelly; more about that later. The chopped pears joined the pumpkin pulp in a stock pot -- use your biggest one with a heavy bottom -- along with a quart each of pear nectar and water, spices and sugar. The rest takes patience and a lot of time, but a lot of that time is unattended. Indeed, I slept through much of it. I didn't even both with a food mill, opting instead to buzz the brew with a stick blender.

Because the process of making fruit butter is more forgiving than that of jam or jelly, consider the directions below more a recommendation than a carved-in-stone recipe. And have lot of jars ready because it will reward you with plenty to savor and share.

1 8 lb. baking pumpkin
6 1/2 lbs. pears
1 cup cider vinegar, divided
1 cup water, divided
1 quart pear nectar or juice (such as Loozo)
1 quart water
1 tsp. fresh ground cardamon (about 20 pods)
1/2 tsp. fresh grated nutmeg
1-2 vanilla pods
3 cups sugar, divided
2 cups brown sugar

Preheat oven to 375 degrees. Cut pumpkin in half and scoop out seeds; reserve to roast later. Cut each half into four pieces and arrange in two baking dishes. Pour 1 cup of cider vinegar and 1 cup of water into measuring cup; distribute evenly over pumpkin in both pans.

Cover with foil and roast about 45-50 minutes or until tender. Remove foil and turn pumpkin pieces; return to oven and continue cooking uncovered about 20 minutes or until most liquid is absorbed. Remove pans from oven. When pumpkin is cool enough to handle, scrape flesh into a large heavy-bottom pot.

Peel and core pears; reserve trimmings for jelly stock (details to follow). Chop pears coarsely and add to stock pot with pear nectar, remaining water, spices and vanilla pods. My stash of pods were fairly dry so I used two and snapped each into inch-long pieces before tossing them into the pot.

My standard jelly pot (the base of my pasta pot) turned out to be too small for the job so I transferred about half of the mixture into my crockpot. To each container add 1 cup sugar and 1 cup brown sugar; mix well. I set the crockpot to high and used a medium-high flame under the rest to cook at a more aggressive boil.

Stir every 20-30 minutes, especially the pot over the burner, being sure to sweep the bottom of both to prevent scorching. When the pears are soft enough to crush with the back of a spoon, use a stick (immersion) blender and process for several minutes. It doesn't need to be perfectly smooth, but let it rip until no pear chunks are obvious.

My goal was to reduce both batches enough to combine it all for an overnight simmer in the uncovered crockpot. After about three hours of mostly unattended cooking, the mix filled the crock to the brim. I left it on the low setting overnight to minimize the chance of scorching. Return to high in the morning and stir every half hour, or whenever you get curious. Be warned that the lava-like mix may spit while bubbling.

How long it will take to be "done" will depend on how thick and/or sweet you like your fruit butter. I added the remaining cup of sugar in the last hour to boost the sweetness, which also helped to boil out the remaining liquid. Place a few spoonfuls in a small bowl and refrigerate 5-10 minutes to check if you like the texture.

Leave about a half-inch of head space in prepared jars -- try to include a bit of vanilla pod in each jar -- and process in a boiling water bath for 15 minutes. Turn off heat and leave in water about 5-10 minutes to settle, then remove and set jars on heatproof surface to cool undisturbed.

I used a variety of jar sizes but the batch yielded about a dozen pints, with a little leftover for the fridge. My first use was to dollop on fig bread and make sandwiches with ham and thin slices of honeycrisp apple. It tasted like something you'd spend too much on for lunch at a nice cafe. 

I suggested to our favorite mostly-vegetarian neighbor that it also would make a delicious grilled sandwich with apple and cheddar. She apparently imagined a whole apple in a sandwich and dismissed the idea as crazy. Apparently, after she had time to think it over, she changed her mind.


Tuesday, October 18, 2011

Carolina Shrimp Burgers

Last week, Whole Foods ran a special on fresh shrimp -- fairly large, sweetly plump specimens for $7.99 per pound. I dispatched Graham with my credit card and directed him to arrive early to snag about three pounds.

We sauteed about half the bounty that night with tender green beans in a house-style piccata sauce that employs variable amounts of capers, butter, white wine and my all-time favorite condiment, Gulden’s Zesty Honey Mustard. Sure, we pass the Grey Poupon now and then, but this golden stuff is too good to limit to the occasional ham sandwich.

The whole thing took about the same time to prepare as a pot of couscous steamed in vegetable stock. It was fabulous, and proof that really fresh seafood can be prepared simply and quickly -- with a fairly fancy results -- for a minimal amount of money and effort.

I planned to save the other half to make shrimp burgers the next day, but Olive’s culinary curiosity exerted itself. Turns outs that about a cup’s worth of raw shrimp – consumed standup style like chic countertop dining in a nice tapas restaurant – is the simplest preparation of all.

The remaining shrimp, perhaps just more than a pound, was transformed into sweet, crispy sandwiches for lunch. I had planned to use fresh bread crumbs but my bread of choice had gone stale and resisted my Cuisinart’s mighty effort to slash the chunks into feathery bits. Instead, I used about a half-cup of moist leftover couscous, but use a similar amount of whatever you’ve got on hand should work.

Makes about 5

1-1¼  lbs. fresh shrimp, peeled½ cup cooked couscous
¼ cup sweet onion, diced
½ small jalapeno, diced (or more, to taste)
1 tsp. kosher salt
Freshly ground pepper
1 egg white
2-3 tbps. canola oil
Soft potato rolls
Tartar sauce

Place first seven ingredients in work bowl of food processor. Pulse-chop into coarse blend; shrimp should still be chunky and not ground into a gummy paste. Use ice cream scoop to measure about 5 balls of shrimp mix. Set on a plate and chill in refrigerator at least 15 minutes.

Pour oil into nonstick skillet and warm over medium-high heat. When oil is shimmery, add shrimp mix, flattening lightly to burger shape and size. Cook undisturbed about 3-4 minutes or until golden brown and crisp. Turn carefully and finish cooking.

Serve on toasted potato rolls with a generous smear of tartar sauce.

Monday, October 10, 2011

Late season tomato tart

My neighbor has pulled the tomato plants from her farm, leaving just a few trays of late-summer globes left to enjoy. I grabbed a handful this weekend with the goal making fried green tomatoes, but instead thinly sliced a mix of green and red to make a beautiful brunch tart.

1 pie crust
8 large eggs
2 tsps. herbes de provence, divided
1 tsp. kosher salt
4 tbsp. creme fraiche, divided
8-9 medium firm tomatoes, green and red

Preheat oven to 375 degrees.

If using a ready pie crust, let sit on counter about 15 minutes to become pliable. Dust surface with flour and roll to smooth dough and stretch just enough to fit into a fluted tart pan with removeable bottom. Tuck into pan, pressing into fluted sides. Crumble a sheet of parchment paper then smooth and lay over crust. Fill with pie weights -- I use a mix of mix of beans and rice that can use saved and resued -- and blind bake for about 7 minutes.

In the meantime, core tomatoes and slice thinly; use a food processor or mandoline, if available. Transfer to colander and let drain about 5 minutes, then blot dry. Set tart pan on a baking sheet. Arrange tomato slices in concentric circles atop blind-baked crust. Set tart pan on a baking sheet.

Break eggs into a mixing bowl. Add a teaspoon of herbes de provence, salt and 2 tablespoons creme fraiche. Whip until frothy then pour over tomatoes. Transfer tart pan on baking sheet to oven. Bake about 35-40 minutes until well set but still a bit wet on top.

Remove to cooling rack. After 10 minutes, lift tart from pan ring. Continue cooling another 10 minutes or until it looks like it will slice cleanly.  Top slices with a dollop of creme fraiche and sprinkle with herbes de provence.

Sunday, October 9, 2011

It's still summer in my coffee cup

Yes, I am well aware that if is officially fall. I wore pantyhose last week and the menfolk in my house already have twice set the fire pit ablaze in our backyard.

This time of year I usually, reluctantly, stop my ritual of freezing coffee cubes for my daily fix. Usually, I return to hot chai. But not this year. Not yet.

I have given up freezing coffee cubes, but I am still firmly entrenched in my morning routine. The difference, and perhaps the reason for my continued interest, is that I've learned how to make a cold-brew concentrate that reduces the acidity while producing a bountiful exilir that's about as simple to prepare as it is to enjoy.

While I didn't deploy Larry's Beans for this batch, I did learn the trick during a recent tour of the company's uber-sustainable business near downtown Raleigh. Their site-roasted coffee is terrific, their ethic is responsible, and their staff -- led by the charismatic Larry himself -- makes you feel even better about buying local. Whether you're local or not, next time you need coffee, consider Larry's Beans.

That said, since Tim has been enjoying Larry's rich Ethopian and Mexican blends for breakfast -- and I still had an unopened tin of Trader Joe's respectable fair-trade Bolivian Blend, which I've used before and like, that's what I used.  I followed the simple ratio they used at Larry's to make a massive cooler of cold-brew coffee for the open house: 1 pound of coarsely ground coffee to one gallon of water.
Larry enthusiastically shows off the repurposed
cooking oil that fuels their delivery vehicle.
 
Since I'm the only who likes iced coffee here, and I only consume one travel-mugful daily, I halved that sum to use 8 ounces of freshly-ground coffee to a half-gallon of water. Make sure the container you choose is large enough to accommodate the grounds; I barely made it with the jar shown.

Use a funnel to make sure every crumble of coffee all gets into the jar; I found a canning funnel is perfect for the task. Stir between grinds to incorporate and make room for the next addition.

When done, refrigerate at least 24 hours, swishing the jar a few times whenever you get curious enough to check on progress. Next day, strain well into a clean jar. I use a jelly bag to catch all the grounds, then rinse and repeat. If you don't have a jelly bag, use several layers of damp cheesecloth or, if all else fails, damp white paper towel (avoid colorful printed varieties) in a colander. The resulting concentrate is decadently aromatic and lusterous.

Use about 1 ounce of concentrate per 6 ounces of water. I use an old measure saved from expensive chai mix to transfer 2-3 scoops into a tall travel mug filled about a third of the way with ice, then top with water -- be sure to leave room for a good glug of milk. I also add a generous shake of stevia per mug to sweeten.

I got creative with my first batch of concentrate and hope to share a success story in a few weeks. I had about two-thirds of a bottle of a middling brand tequila leftover from a canning project. I read that Patron recently introduced a coffee-infused brand, so I figured, why not? I added 4 ounces of concentrate and 3 tablespoons each of coarsely ground coffee and sugar. I shook it faithfully for a few day then tucked it away to do its thing. If anyone I know receives some as a holiday gift, you'll know it worked,